
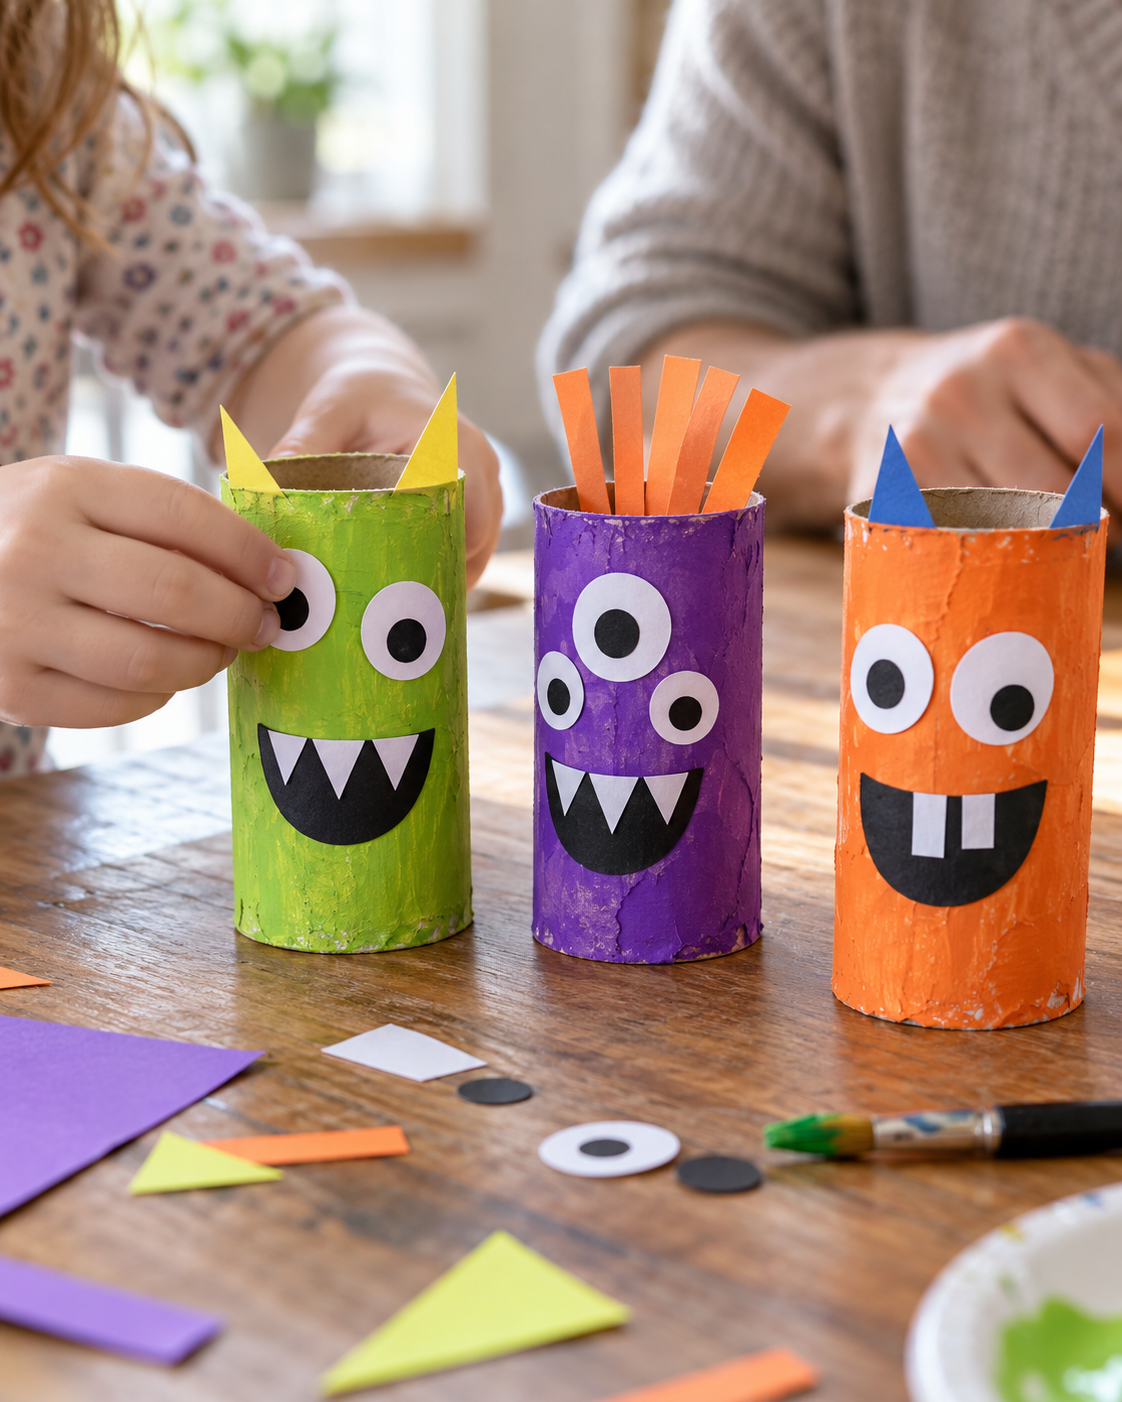
A little paint, a few scraps of paper, and an empty cardboard roll can turn an ordinary October afternoon into something fun. You don’t need expensive supplies or complicated instructions—just a space to work and a little patience while the glue dries.
These five Halloween crafts let children make decorations they can proudly display around the house. Some involve painting, others use cutting and gluing, and each leaves plenty of room for their own ideas. A monster with three eyes or a cat with crooked ears is all part of the fun.
Choose one activity to start with, cover the table, and gather your supplies. The activities below follow the same order as the five images.
Before You Start
Use washable, child-friendly paint and glue, and keep a damp cloth nearby. An adult can prepare difficult cuts and punch holes ahead of time so children can concentrate on decorating.
Supervise throughout and adapt the supplies to your child’s age. Paper eyes are a useful alternative to small googly eyes, especially for children who still put things in their mouths. For the lantern activity, use only a battery-operated light with a secured battery compartment.
1. Paper Plate Spider Webs

Threading yarn across a paper plate creates a wonderfully tangled spider web. Children can choose where each strand goes, so there’s no pattern to follow and no need to make everything perfectly even.
Once the web is finished, a little paper spider gives it a proper Halloween touch.
What You’ll Need
- One sturdy white paper plate
- White yarn
- A hole punch
- Black construction paper
- Craft glue
- Child-safe scissors
- A small piece of tape, optional
How to Make It
- Have an adult punch eight to twelve holes around the plate’s rim.
- Cut a manageable length of yarn. Thread one end through a hole and tie it securely to the rim.
- Pass the yarn across the plate and through another hole.
- Continue threading through different holes, letting the strands cross in the center. Avoid pulling so tightly that the plate bends.
- Tie off the loose end when your child is happy with the web.
- Cut a round spider body and eight legs from black paper. Glue the pieces together, then attach the spider to the web.
A helpful tip: Wrap a little tape around the end of the yarn to make a firm threading tip. It’s much easier for small hands to push through the holes.
Set the finished web on a shelf or hang it from a short loop of yarn, out of reach of younger children.
2. Cardboard Roll Monsters
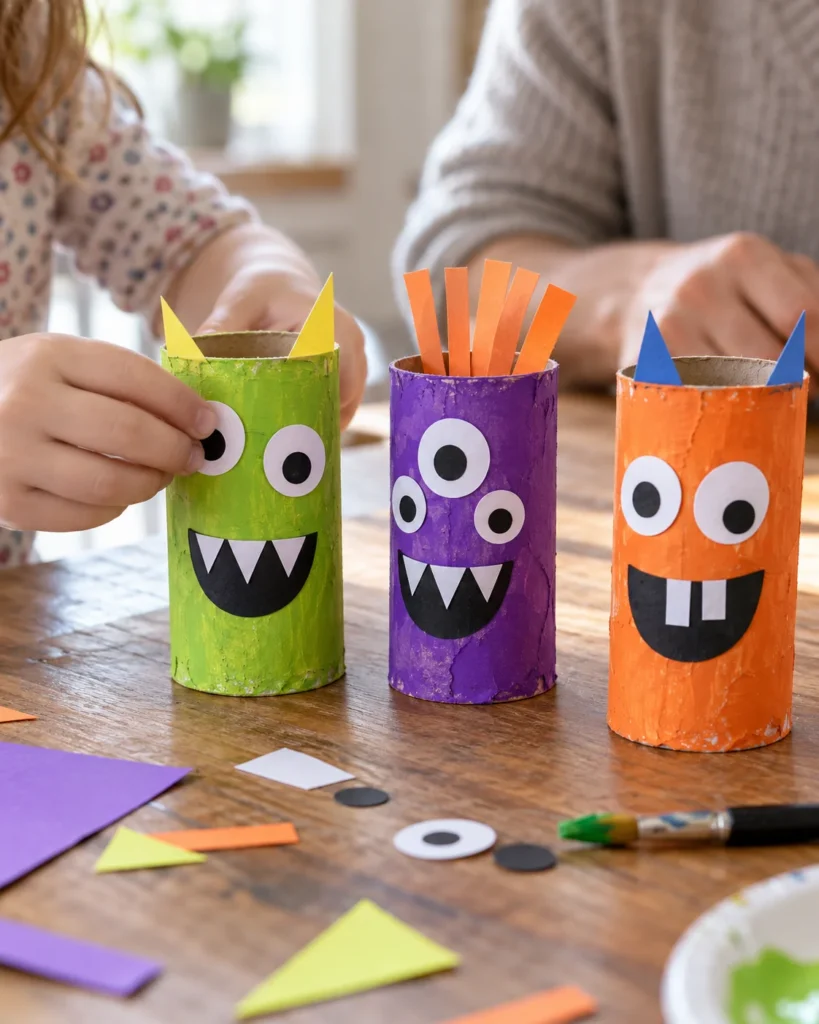
Empty cardboard tubes make excellent little monsters. Their round bodies stand up on their own, and a few paper shapes can give each one a completely different expression.
Set out several paint colors and let children decide what their monsters will look like. One might have a single enormous eye, while another gets a mouth full of mismatched teeth.
What You’ll Need
- Clean cardboard craft rolls or paper towel tubes cut into short sections
- Washable paint
- Paintbrushes
- Colored and white construction paper
- A black marker
- Craft glue
- Child-safe scissors
How to Make It
- Paint each cardboard roll green, purple, orange, or any color your child chooses.
- Leave the rolls to dry completely.
- Cut paper circles for the eyes and draw black pupils in the centers.
- Cut a mouth from black paper and add white paper teeth.
- Glue the eyes and mouth onto the painted roll.
- Add paper horns or strips of paper hair inside the top edge.
Make it playful: Ask your child to name each monster and decide what kind of voice it has. Once the glue dries, the characters can become the stars of a little Halloween puppet show.
Arrange them along a windowsill or shelf. A whole row of different faces makes a cheerful homemade decoration.
3. Handprint Ghost Art
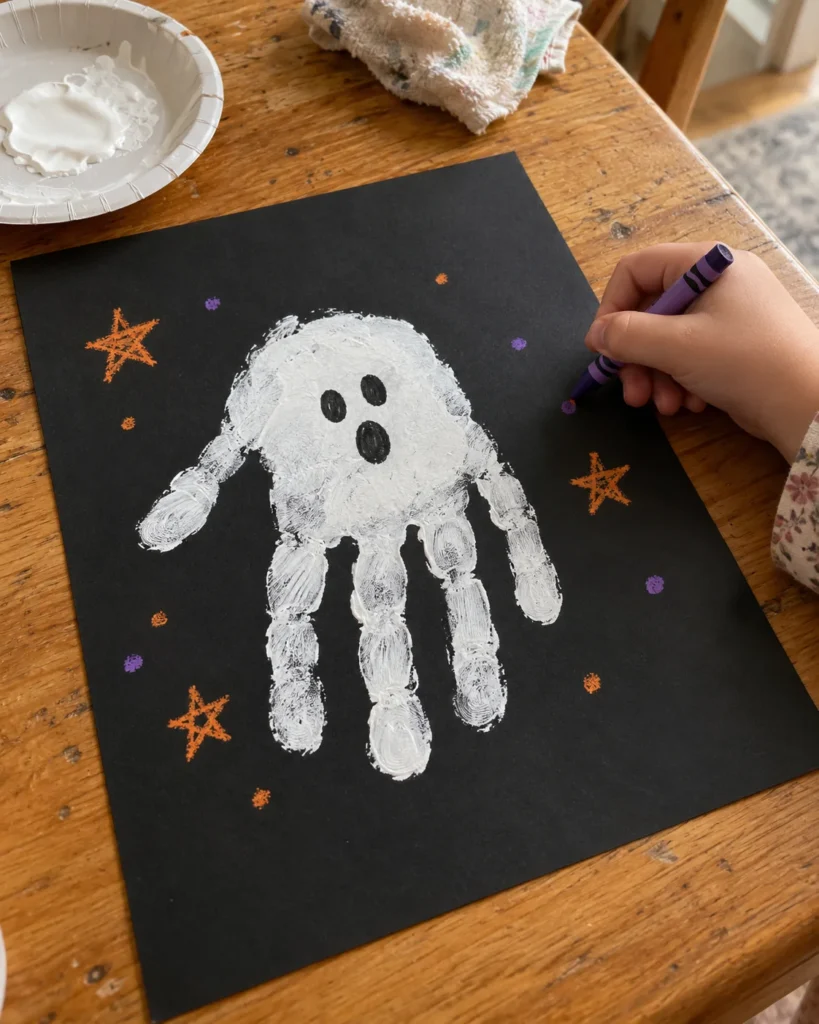
A white handprint on black paper becomes a friendly ghost with just a few extra marks. This is also a lovely keepsake—you can write your child’s name and the year on the back before putting it away after Halloween.
The paint doesn’t need to leave a perfect print. Uneven edges give the ghost a floaty, wispy look.
What You’ll Need
- Black cardstock
- Washable white paint suitable for hand painting
- A wide paintbrush or shallow paint tray
- A black marker
- Orange and purple crayons
- A damp cloth
How to Make It
- Brush a thin layer of white paint onto your child’s palm and fingers.
- Press the hand onto black cardstock with the fingers pointing toward the bottom of the page.
- Lift the hand straight up, then wash away the paint.
- Let the handprint dry completely.
- Draw two eyes and a round mouth on the palm section.
- Decorate the surrounding paper with orange and purple stars, dots, or a little moon.
A helpful tip: Make a practice print on scrap paper first. A thin layer of paint usually gives a clearer handprint than a thick, slippery coating.
Let siblings make their ghosts on the same large sheet, or give everyone a separate page for a small Halloween gallery.
4. Mummy Jar Lanterns
A loosely wrapped jar and a pair of eyes are all it takes to make a little mummy lantern. When the LED light is switched on, the glow shines through the gauze and the gaps between the layers.
These look especially sweet grouped together on a table in the evening.
What You’ll Need
- A clean, dry, unchipped jar, or a clear plastic container for younger children
- White gauze or strips of white crepe paper
- Craft glue
- Paper eyes or age-appropriate googly eyes
- A battery-operated LED tea light with a secured battery compartment
How to Make It
- Place a small dab of glue on the outside of the container and attach the end of a gauze strip.
- Wrap the strip around the container, overlapping it in some places and leaving small gaps in others.
- Secure the loose end with glue. Keep the container’s opening clear.
- Attach two eyes near the upper half of the mummy.
- Allow the glue to dry.
- Have an adult place the LED tea light inside and switch it on.
A helpful tip: Hold the wrapped container up to a window before adding more layers. If very little light passes through, stop wrapping or loosen a section.
Use an LED light only, and place finished glass lanterns on a stable surface where children can admire them without carrying them around.
5. Paper Plate Black Cats
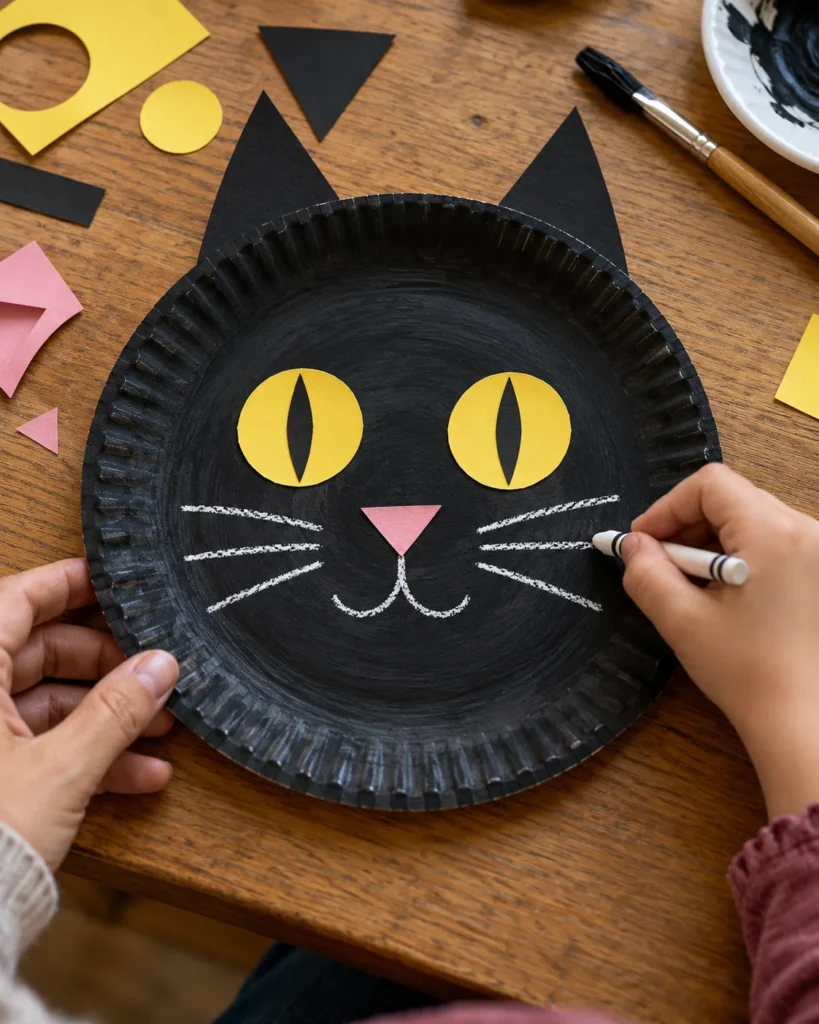
A painted paper plate becomes a Halloween cat with pointed ears, bright eyes, and a tiny pink nose. Children can change the expression simply by moving the eyes or drawing a different mouth.
This is a good activity to spread over two short sessions: paint the plate first, then add the face after it dries.
What You’ll Need
- One paper plate
- Washable black paint
- A paintbrush
- Black construction paper
- Yellow or green construction paper
- Pink construction paper
- A white crayon
- Craft glue
- Child-safe scissors
How to Make It
- Paint the paper plate black and leave it to dry.
- Cut two black paper triangles for the ears. Glue them behind the top edge of the plate.
- Cut two yellow or green circles for the eyes.
- Add narrow black paper pupils, then glue the eyes onto the plate.
- Cut a small pink triangle and attach it beneath the eyes for the nose.
- Draw a mouth and whiskers with a white crayon.
Make it your own: Add a paper bow tie, a little collar, or one folded ear. Let children try arranging the pieces before gluing them down—they might discover an expression they like even better.
Display the cats on a wall or prop them on a shelf alongside the cardboard monsters.
Bring Your Halloween Crafts Together
Once everything is dry, let the children help choose where their creations belong. Handprint ghosts can go on the fridge, monsters can line up on a windowsill, and spider webs and black cats can decorate the craft corner.
You don’t have to finish all five activities in one afternoon. Save leftover paper shapes in an envelope and keep the next project for another day. A short craft session can be just as enjoyable as a whole afternoon of making.
And if the finished decorations look a little uneven, leave them that way. Those crooked teeth, smudged handprints, and oversized eyes are what make each child’s work their own.